Gutter Guard Corrugated Roof Installation New Zealand
Gutter Guard Corrugated Roof Installation with installers throughout Waikato, Bay of Plenty, Gisborne, Hawke’s Bay, Manawatū-Whanganui, Tasman, Nelson, Marlborough, Christchurch, Canterbury, Otago and Southland.
Versatile enough to fit the guttering attached to any sturdy roof, but good old tried and true corrugated iron is a mainstay style of roofing material, still popular today. And as Gumleaf is also made from steel – BHP Bluescope Australia steel (1851) – you have double the durability and longevity, plus a 15-year warranty.
Gumleaf Gutter Guard is fitted to corrugated iron roofs using a straightforward technique that even your home handyman can learn. We offer step-by-step instructions below, or, if you want us to step in and do the work for you, we assure you of an excellent result at an extremely cost-competitive price.
There’s nothing as strong as steel.
Email: info@gumleaf.co.nz
Free Calling: 0800 486 532
The methods we utilise always adhere to Site Safe legislation and as we are also certified to work at height, we understand how to manage and minimise any potential risks in our installation process. We have an engineering report available on request and are happy to answer all your questions – just give us a call or email us.
Email: info@gumleaf.co.nz
Free Calling: 0800 486 532
This is how we install Gumleaf Gutter Guard:
On-site measure and quote. On acceptance of our quote, we work on a 7 to 10 day period to begin your guttering installation. Completion of the installation is usually one to two days, dependent on the size of your home or business premise
Colourbond® or Coloursteel® choice to match the existing roof
Flush out existing gutters and downpipes
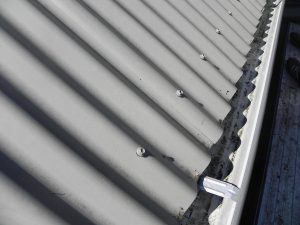
Measure the gap between the gutter lip and edge of the roof
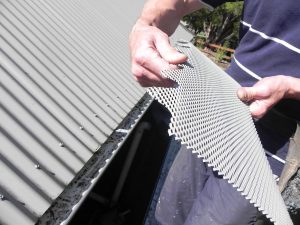
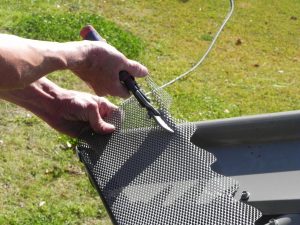
Hand fold the scallops of Gutter Guard down 30 degrees with thumb and forefinger, and then lay in place, ensuring that the scallop fits nicely in the corrugation on the roof
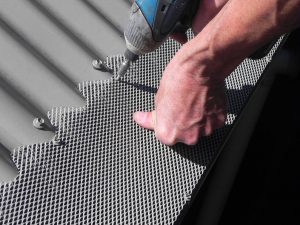
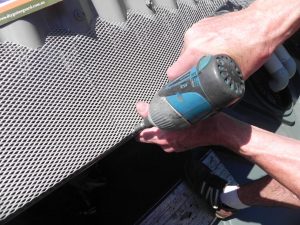
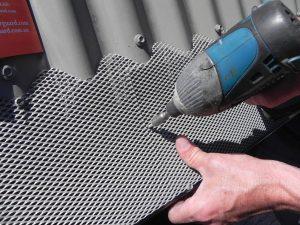
Secure to the guttering lip using tapered, colour matched stitching screws, approximately 300mm apart interlocking each overlap
Place screws along the scalloped edge on every 2nd corrugation rise and aligned with the existing roof screws
Each piece of Gutter Guard is interlocked where they overlap
Run guard over the hip and cut and screw to fit neatly
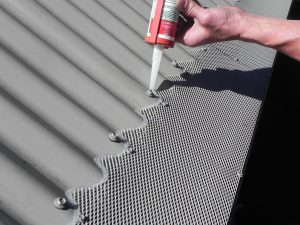
Apply generous quantities of Gorilla (non-toxic, transparent, unaffected by moisture, weathering, and UV exposure) MS-based silicon adhesive sealant
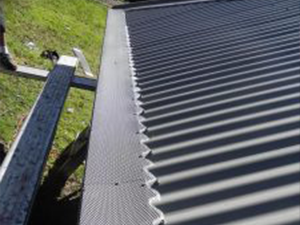
Stand back and enjoy!
Happy Customers
Gumleaf has many happy customers who have found having Gutter Guard installed by our very competent team is a worthwhile addition to their home..
Installation of Gutter Guard
Step 1
Our Installer cleans out the gutters and flushes the down-pipes.
Step 2
Then we fold the scallops of gutter guard down about 30 degrees with thumb and forefinger, and then lay in place, ensuring that the scallop fits nicely in the corrugation on the roof.
Step 3
We secure to the lip of guttering with self-tapping screws, approximately 300mm apart.
Step 4
Our installer places along the scalloped edge, screws on every 2nd corrugation rise aligned with the existing roof screws.
Step 5
Each piece of Gutter Guard is interlocked where they overlap.
Step 6
We then run guard over the hip and cut and screw to fit neatly.
Step 7
Last but not least, we apply a thin bead of silicone along the scalloped edge of the Gutter Protection eliminating any small gaps.
Step 8
Stand back and admire your professionally installed Gumleaf Gutter Protection.

